Lighting
As you can see in the above image, we have a directional light which is providing the overall global illumination, and we also have some spot lights dotted around on the ceiling to make it look like real lights.
The spot lights provide three quarter and rim lighting effects so it makes the characters pop out a bit more in the animation . Overall I feel that the scene looks very effective and the lighting makes all a difference. It is very cheap, efficient and easy to render too.
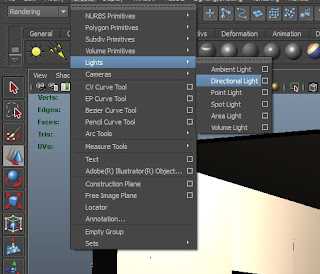
 So how did we create the lighting? Making a directional light is easy. All you need to do is go to Create > Lights > Directional light, or you can choose a spot light but for now we will focus on directional.
 When the directional light has been created, you can click on the attribute editor and simple adjust the intensity, this is pretty much the only option we needed to adjust as it gave us the desired effect we wanted.
 Other than that, there isn't much else you can do with a directional light, they are very limited in terms of variety and flexibility. Also it doesn't matter where the directional light is positioned in the scene because no matter where you put it, it will always have the same lighting effect. It works based on the rotation. So if it was facing down, it would be identical to having the sun at its highest peak in the mid day.
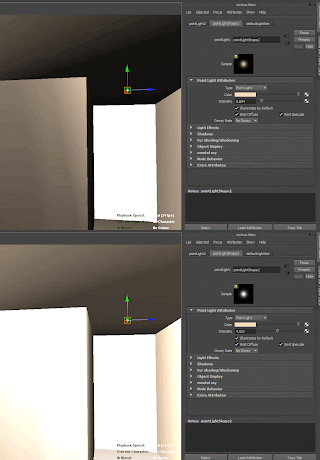
For the spot light, its a similar process, just click the light and change the colour, as you can see I've changed it to a orange hue.
When you have done this simply change the intensity, as you can see in the image, its affecting the brightness.
That concludes the lighting we used for our scene, very simple but very effective in the long run and it made our cinematic look brilliant by the end.
Camera Angles
When we animated our scenes, we decided we wanted to animate the cameras old school and physically move the cameras and key each individual frame to try and achieve a smooth fluent camera sweep motion.
Here is the URL:https://www.youtube.com/watch?v=LN3rVJu6jpc&feature=youtu.be
Above is an example of the kind of camera movements I was trying to create from scene 1, we did this manually, so we didn't need to attach the camera to a CV curve and allocate a path for it to follow, We did it key frame by key frame.
To create a camera its simple, just go to Create > Cameras > Create Camera, there are different cameras such as Camera and Aim and Camera, Aim and Up. All of which have their different technicality's. But for the purpose of this post I am only talking about the camera that i used which was just the standard camera. I found this very useful.
 The cool thing about these cameras is that you can press "T" on the keyboard and select the focal point, so the camera will look at the target area you want it to, without changing the focal point, but still being able to adjust the position of the camera.
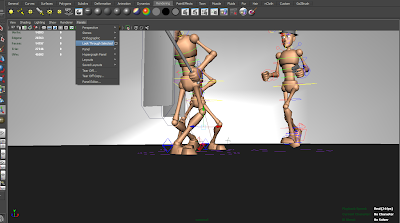
Another cool little trick is to select the camera, and hit Panel > Look Through Selected, this will allow you to look through the camera and see exactly what it is your aiming it.
Cameras are very easy to use, and the glory of them is that you can actually go into the cameras view, and move around like you would in perspective view, but you are actually positioning the camera to where you want it to be as you move around in its view.
Overall the camera angles we created weren't very technical but they really portrayed the animation well, and by over working the cameras, it can really throw the viewer off and it will distract from the animation itself.


No comments:
Post a Comment