The piece of kit is used for motion capture and cinematography, it uses techniques such as pre-visualisation and had real-time 3D character animation capability which allows for many possibilities to create incredible fast action sequences, or softer more enchanting animations.
Pre-Visualization
The advantage of motion builder is its capability to allow an animator or director to see their scene whilst they are working on it. It doesn't need to be rendered out. The director can experiment with camera angles without it contributing to the final shot too.
Computer Game Animation
Motion builder is often used in most games to capture the essence of fluid movement, it is used in games such as Halo 4 and Fable 3. It allows for the animator to have a heightened animation in terms of realism and complexity.
Editing Motion Capture
This software is used quite heavily in the modern production pipelines. The glory of this software is that animations and motion capture can be exported from thousands of different software, brought into motion builder and edited with the blink of an eye.
Motion build uses file formats such as .FBX which is an abbreviation of Filmbox which was the original name for motion builder files.
Motion builder is compatible with other Autodesk software too such as 3Ds Max and Maya, it is very useful and can be integrated with lots of different software packages.
Anyway enough talk about motion builder, lets actually get a good look of the user interface, i will now be posting a step by step guide as to how to use motion builder and use its default user interface. Seeming as I am only just looking into this myself, i am very excited to experiment with the different tools.
When you open Motion builder you will see the default user interface, this consists of many elements that i will be explaining. There is the following:-
Viewer - This is the top panel where you can see your imported characters and cut scenes.
Transport Controls - These are located in the middle of the screen, it is the bar that looks like a time slider.
Navigator - This is the bottom area where you can control things like curves, audio, cameras, lighting and so on.
Key Controls - This is pretty self explanatory, it is where you will control the keying and the playback.
Animation Layers - This will be where all the tens of hundreds of animations will be stored and organised, it is very much like a layers panel in Photoshop.
Asset Browser - Asset browser is where all of your assets will be stored, you will also be able to search for other resources in this panel.
Character Controls - Character controls will allow you to control the rig and the character's themselves within the cut scenes.
All of the above can be opened from the window tab other than the viewer as it always has to be on screen.
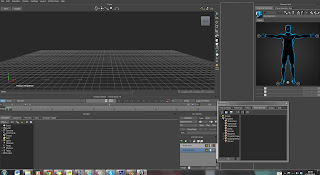
You can also click Layout at the top and there will be saved layout presets which are very useful, the default is named Editing. Motion builder is very customisable and allows you to pretty much change the user interface anyway you want, if you left click hold on the banner of any panel in the software, you will be able to drag it to where ever you want, making your work space more efficient and user Its all down to your own personal preference. friendly.
When you have found a layout that you like the look of go to Layout > Create Custom > OK.
Keyboard configuration couldn't be any easier either, its simple, all you need to do is navigate to Settings > Preferences > Keyboard Configuration and change your key bindings to whatever you like. The great thing is, that you can actually set up the keyboard configuration so it works like Maya's settings.
In the viewer your tools will be located at the top centre area of the main stage. Simply click and drag on either controller to execute desired movement. There are multiple controls for Roll, Tumble, Magnify, Pan, Orbit and Dolly.
Setting Up An Actor and Using Motion Capture
So when a motion capture session takes place and the actor is doing their movements, they usually start out in a T pose so the data trails can be located and recorded by the software. The actor then continues to animate themselves and perform the motion capture sequence. When they have finished a set of movements called ROM (Range of Motion) is captured, these files are used to set up the actual files for motion builder itself.
Using the default Autodesk test files, I will be importing these into Motion builder in .c3d (Coordinate 3D) file format. To demonstrate how the software actually works.
Importing file's really couldn't be any easier just go to File > Import Motion File and when a window pops up, just select the c3D file.
Make sure that you select Import Motion File because its common for people to just drag the file in, or do a generic import and the files can get corrupted and sometimes the software wont read them.
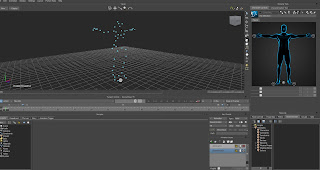
When the file has been imported you will be able to see the blue dots on the screen, these are the different variables that make up the motion capture on the screen. They are called Optical Markers, They form the T Pose
By hitting CTRL + W, you can see the schematic mapping of the optical markers and it will show you the generic hierarchy of the connections themselves.
In total there are about 50 individually named markers and it is the optical markers themselves which group everything together.
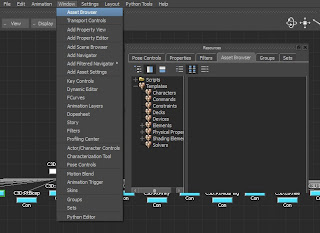
Now it is time to add an actor into the scene, firstly you will need to open up the asset browser if you don't already have it open. By default it is in the bottom right corner but for the sake of practise, Navigate to Windows > Asset Browser.
When this is open, look to the left and Click Browser > Templates > Characters > Actor.
Drag the actor into the main viewer and proceed to the next step.
Once this is done your scene should look like this, you can toggle back out of the schematic window by hitting CTRL + W again.
As you can see there is now a mesh in the center of the viewer, the next thing we will need to do is to match the proportions of the mocap file to the actor as accurately as possible.
The next thing we will be required to do is scale the optical node which in turn will affect all of the data at once which is currently what we are trying to achieve.
Simply Select the optical node at the bottom of the grid and select scale on the right panel.
Try to match the head and the shoulders perfectly as all T poses are executed differently.
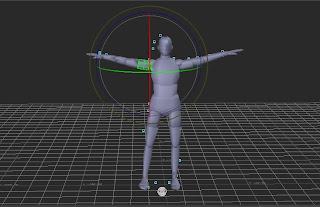
After playing around with the rotations, scale and translations you should have something looking similar to this.
Remember that you can scale the actor, and by selecting the hips, upper leg and shoulders, you can move and scale the major body parts easily.
 If you scale certain segments , for example the lower leg, this will make the body look out of proportion and we don't want that. So try and scale the major limb segments which will affect the rest for you.
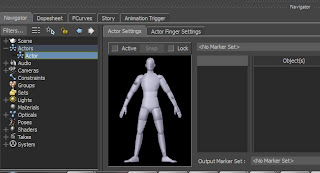
Next open up the navigator window if it isn't already open, and access the actor settings. The easiest way to do this is by Double Clicking Actor > Actor again. This will open up a character penal at the bottom.
Next click on the market set tool and hit create.
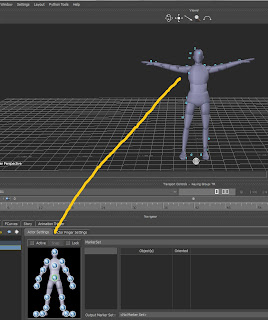
Now it is time to assign the markers to each body part, this is a very meticulous process so make sure everything is accurately done.
Click ALT + Left mouse button or X + Left mouse button if you are using the Maya settings.
A good tip would be to hit wire frame mode on the actor so you can see exactly where you are putting the markers, I was using the Maya settings, so the Short cut was "1" and "3" for shaded mesh.
You can also hide the actor by clicking Window > Actor > Character Controls > Show/Hide Actor (All)
Make sure the head markers are within the head, the shoulder and arms within the major joints so the elbow.
Legs are important to get perfect too, once you have done this, proceed to the next step.
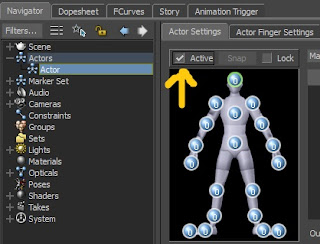 Now that this is done we need to Activate the actor, Un-hide the actors body so you can see the mesh and make sure you save your work and backup! Next go to the Actor settings can click activate on the marker set panel. By enabling this, it will allow the actor to move with the markers, you can go back and make and adjustments if required. Its best to be as thorough as possible though with the positioning a first because you can encounter strange problems and movements if you position them wrong. Motion builder sometimes struggles to calculate the movements correctly.
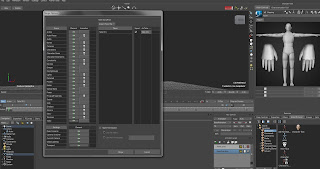 Next we need to add an actual character into motion builder which will replace the actor itself. Using the Character.FBX file that has been provided for me, I will now import it into motion builder.
Go to File > Merge on the menu bar and a window should pop up, locate and load your Character.FBX file and a mesh should appear in the center of the screen.
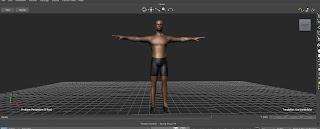
By now you should have a new mesh imported, now before it looks like this, you will have this mesh super imposed on the actor and the mocap markers, so Select the character hit >Display > Hide Unselected. This will get rid of everything in the scene other than your character.
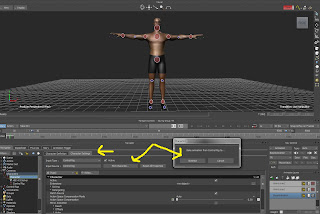 You can also save and import the files into motion builder to test them and make any necessary adjustments.
 If you want to edit a piece of motion capture by adjusting things such as reach and pull in the character control window. You can do this by clicking Navigator < Characters < Character (double click) < Character Settings > Plot Character > Control Rig.
Remember that you must select AnimLayer1 in the layers panel for this to work and for you to be able to start keying.
I hove this have been an interesting tutorial and has shed some enlightenment as to how to start out using basic motion capture settings and processes.


No comments:
Post a Comment