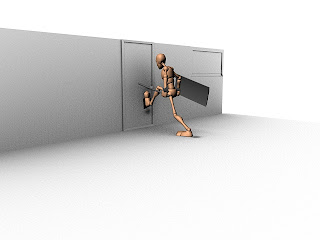
Above is a render of a basic environment I have put together, It was quite simple and the walls are tiled, so they are made out of lots of individual panels so I can make a wall shorter or longer depending on the animation length and the span/distance at which a character runs.
I'm very happy with the environment and I think it went successfully as a test, but that Isn't quite what we were trying to achieve. Doing everything this way would have involved a hell of a lot of rendering time which we really didn't have time for, and applying the textures was very time consuming too.

I am now going to talk about how to create an ambient occlusion texture which will make a white clinical look on your objects when you render out, exactly like the image above.
Its quite a simple process but it just takes a bit of practise. The first thing you need to do is open Hypershade. Click Window > Rendering Editors > Hypershade
First thing is we need to add a surface shader to the scene, to do this go into the hypershade and click "surface Shader", When you have done this proceed to the next step.
When the surface shader has been created, scroll down in the textures panel and search for "mib_amb_occlusion" and click it.
Next you need to link to two together and and the easiest way to do this is middle mouse drag the occlusion onto the surface shader then release, when options appear press default.
After you have connected the two you should have something that looks similar to this, now that they are both connected we need to apply them to the material mesh.
Select all of your geometry and right click the surface shader > assign material to all objects.
When you have done this the geometry should now appear black. This is fine it just means that there is no light in the scene.
By default this is what a render should look like through mental ray, its not the best quality and its very grainy.
A way we can get around this is my changing the settings in mental ray.
Make sure the following settings are set by following the image on the left. They are not the default settings but by following the image you will be able to sort out the grainy effect that we seem to keep getting.
The main settings which change this are the resolution, max samples, ambient occlusion shadows and setting the quality to production.
When all of these settings have been changed your render should look something like the one below.
The main settings which change this are the resolution, max samples, ambient occlusion shadows and setting the quality to production.
When all of these settings have been changed your render should look something like the one below.
Above you can see the final render, it looks far less grainy and the quality is excellent but this process of creating a nice scene is far too convoluted and takes a lot of time. It took me about 10 minutes to render one frame on the computers in university so time isn't something we can readily throw away and we had to find another means to render out our animations.
Instead we applied some simple textures to the scene and this worked fine, it didn't have to deal with ambient occlusion rays and it wasn't difficult to calculate lighting . Overall, very happy with the result.


No comments:
Post a Comment